If you want to enjoy the beauty of beautiful wild birds and take a close shot of them, you should use a blind. It always provides you with opportunities to make a masterpiece. For this, In the article, I will give you a step-by-step guide on how you can build a blind to capture bird images.
What is a bird blind?
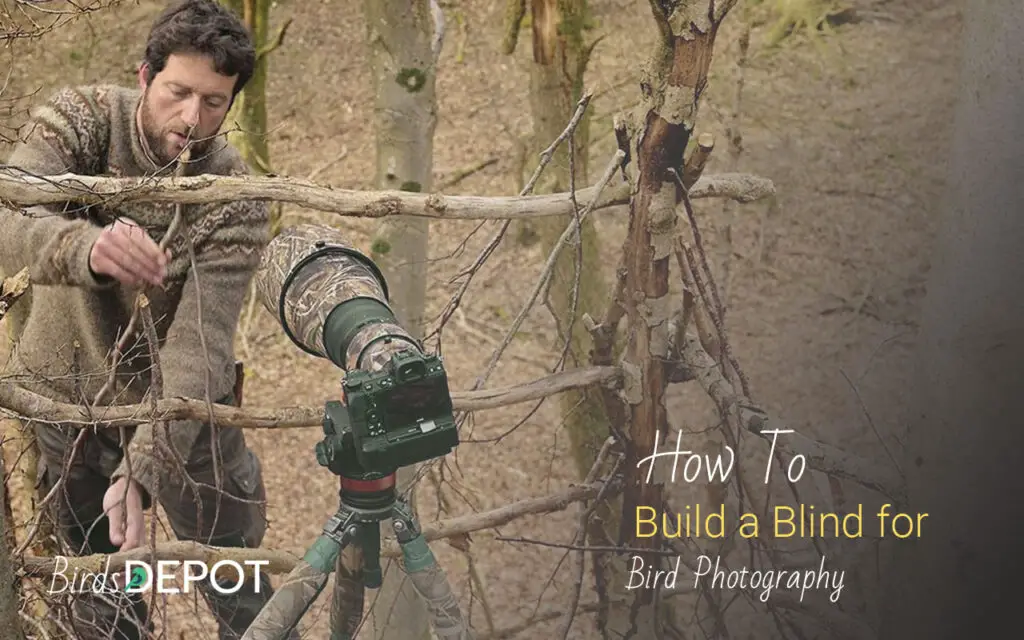
A bird blind is a structure designed to help you remain concealed from wildlife, allowing you to observe them without being noticed. Its construction mimics a natural habitat, making it less likely for birds to see you when you’re hidden inside. As a result, you have a better chance of taking close-up photos, as birds are more likely to approach the blind without fear.
For this, birds do not see you when you hide behind a blind. The chance that you will take better photos as birds do not hesitate to approach close to the blind.
Where should you set up the bird blind?
You should always select the bird blind placement location carefully. Otherwise, you will sit all day long without seeing a single bird. If you want to take a bird photo from your backyard, place the blind near the tree or shrub where birds sit before landing in the feeder or birdbath.
Also, if you want to take photos from outdoor areas, you should have enough information about the bird’s flight route and where they land in search of food. Search for such a place and set up the blind. You have to know about birds’ natural habitats in your local areas to find the perfect place.
How To Build A Blind in the Backyard
Creating a blind for bird photography in your backyard or an open space is a fantastic way to capture stunning shots of local wildlife. Below, I show you how to build a simple yet effective blind that blends seamlessly into your outdoor surroundings, allowing you to get closer to birds.
Materials Needed for Building Your Bird Blind
Basic Materials
- Camouflage Netting or Fabric: The most important material for a blind person is camo fabric, which helps you blend in with the surrounding environment. Opt for natural, earth-toned colors like green, brown, or tan.
- PVC Pipes for DIY Projects or Wooden Poles: These materials are essential for the frame of your blind. PVC pipes are lightweight and easy to work with, while wood offers more durability.
- Tent or Mesh: If you want full coverage, a tent-like structure or mesh fabric will give you a complete enclosure.
- Tie-Down Ropes or Stakes: These will help keep your blind anchored to the ground, especially in windy conditions.
- Comfortable Seating: For long birdwatching hours, bring a portable folding chair or a cushion to make your setup more comfortable.
Optional Enhancements
- Mesh or Clear Plastic Windows: If you want better visibility, consider adding mesh or clear plastic windows to allow unobstructed views without compromising your cover.
- Roof for Weather Protection: A simple tarp or weatherproof cover will help protect you from the elements during those long hours in the field.
Step-by-Step Guide to Building a Bird Photography Blind
Now that you have all your materials, it’s time to start building your blind. Follow these steps for a functional and practical setup.
Step 1 – Choosing the Right Location
The first step in building a blind is choosing the perfect spot. Birds tend to frequent areas with food, water, and shelter. Here are some tips for selecting the right location:
- Position Near Feeders or Birdbaths: Birds are naturally attracted to feeders and birdbaths, as these are reliable sources of food and water. Setting up your blind close to these areas increases the likelihood of birds coming into range for a great shot.
- Look for Natural Perches or Nesting Areas: If you have trees, shrubs, or hedges that birds like to perch on or nest in, positioning your blind nearby will give you easy access to photographing their natural behavior without disturbing them.
- Maximize Natural Cover: Ensure your blind is hidden behind some natural cover, such as thick bushes, trees, or tall grasses. This helps to blend the structure into the environment, making it less likely that the birds will notice your presence.
Step 2 – Constructing the Frame
Once you’ve selected the location, it’s time to build the frame of your blind. Here’s how:
- Choose Materials: You can use PVC pipes for an easy, lightweight frame or wooden poles for durability. The frame should be sturdy enough to withstand wind and outdoor conditions.
- Assembly: If you use PVC pipes, connect the pieces using T-joints and elbows for easy assembly and disassembly. Wooden frames require more effort to cut and assemble but offer greater sturdiness.
- Anchoring: Ensure the frame is well-anchored to the ground with tie-down ropes or stakes. This will prevent your blind from blowing away in windy conditions.
Step 3 – Adding Camouflage
The next step is camouflaging your blind to blend seamlessly with the environment.
- Use Camouflage Fabric: Drape the camouflage fabric over the frame, ensuring it covers the entire structure. Ensure the fabric is loose enough to allow you to move freely inside the blind.
- Natural Foliage: Add natural foliage, such as branches, leaves, or grass, to the outside of the blind. This will enhance the camouflage and make the blind blend better with the surroundings.
- Visibility: Leave openings for your camera and viewfinder, ensuring a clear line of sight without exposing yourself.
Step 4 – Creating Viewing Windows
For the best bird photography shots, you’ll need proper viewing windows.
- Window Openings: Cut small openings in the fabric or mesh to which your camera can peek. Ensure they are large enough for your lens but small enough to maintain cover.
- Adjustable Mesh or Covers: Add adjustable mesh or covers to these openings to regulate visibility. This is especially helpful if birds come into view unexpectedly.
Building a blind for bird photography in the jungle or open place
Building a blind for bird photography in the jungle presents a unique set of challenges. Still, it can also provide incredible opportunities for nature photography and capturing rare and exotic bird species. The key to success in the jungle is creating a structure that blends in with the dense foliage, offering both concealment and comfort. Here’s how to make a practical blind for jungle bird photography:
Step 1 – Choosing the Right Location
- Research Bird Habits: In the jungle, birds often gravitate toward specific areas like water sources, fruiting trees, or forest edges. Look for places with active bird populations. Study the birds you want to photograph. Understand their feeding habits, preferred habitats, and migration patterns to find the best locations for your blind.
- Look for Water Sources or Feeding Areas: Birds are attracted to water for drinking, bathing, and feeding areas where food is abundant. Positioning your blind near these locations can increase your chances of a successful shoot.
- Natural Cover: Ensure the location offers enough natural cover—like trees, shrubs, or tall grasses—to help hide your blind from the birds’ view.
Step 2 – Building the Frame
- Use Natural Materials: In the jungle, construct your frame using nearby branches, bamboo, or flexible vines. This will help the blind blend in with the surroundings.
- Stability: Ensure the frame is sturdy and secure by weaving the materials together tightly or using ropes to fasten them. Jungle terrain can be uneven, so the structure must remain firm.
Step 3 – Camouflage the Blind
- Layer Natural Foliage: Use leaves, branches, and other natural materials from the surrounding environment to camouflage the frame. The more you can blend the blind into the landscape, the better.
- Cover the Ground: To create an additional layer of camouflage, consider spreading foliage on the ground.
- Keep Openings Small: To avoid exposing yourself, make only small openings for your camera to peek through. Use mesh or fabric that matches the colors and textures of the jungle.
Step 4 – Positioning the Blind
- Avoid Direct Sunlight: The jungle is dense and shadowy, so position your blind so that you’re not exposed to harsh sunlight. Look for shaded spots under large trees or thick canopies.
- Consider Wind and Sound: The jungle can be windy, and birds can easily detect movement. Ensure your blind is securely anchored and you’re in an area where the wind won’t give away your position.
Step 5 – Setting Up Your Bird Photography Timing
- Early Setup: Arriving well before dawn is key in the jungle. Birds are most active in the early morning, and the jungle’s dense foliage makes it harder to get the perfect shot once the sun rises.
- Quietness is Crucial: The jungle is alive with sounds, so keep noise to a minimum when setting up and during your photography sessions.
Inspirational Videos for Building Blind for Bird Photography
Here are a few inspirational video ideas that could help with building a blind for bird photography, offering tips and guidance on everything from materials to setup:
Tips for Making the Most Out of Your Bird Photography Blind
Using a blind can significantly improve your bird photography, but patience and proper technique are key to success.
Be Patient and Quiet
Bird photography requires stillness and quiet. Avoid sudden movements that could scare the birds away. The longer you remain in the blind, the more likely birds will become comfortable with your presence.
Taking Care of Your Blind
To ensure the longevity of your blind, it’s essential to keep it clean and stored correctly when not in use. Regular maintenance will prevent wear and tear and make your setup last longer.
Enhancing Your Shots
- Long Lenses: Use a long lens (300mm or higher) to get sharp shots from a distance. This allows you to photograph birds without getting too close.
- Experimenting with Angles: Try different angles and perspectives to capture unique and striking photos.
Necessary equipment you should carry
When setting up a blind for bird photography, it’s important to be well-prepared by bringing the right equipment to ensure a smooth and successful shoot. Here’s a list of necessary gear you should carry:
- Camera Body: A DSLR or mirrorless camera for capturing high-quality bird photos.
- Telephoto Lens: A lens (200mm or more) to photograph birds from a distance without disturbing them.
- Wide-Angle Lens (Optional): A lens for capturing wide environmental shots or scenery around the birds.
- Tripod: A good Tripod for stable camera support to avoid shaking to get sharp images and a Tripod head for flexibility to frame your view.
- Monopod: A lighter, more portable alternative to a tripod, practical for mobility.
- Binoculars: Aids spotting birds from a distance and observing their behavior before shooting.
- Camouflage Clothing: Neutral or camo attire to help you blend into the environment.
- Extra Batteries: Ensures your camera doesn’t run out of power during long shooting sessions.
- Memory Cards: High-capacity storage for storing all your bird photography shots.
- Remote Shutter Release: A device that allows you to take photos without touching the camera, reducing shake.
- Snacks: Energy-boosting snacks to keep you going during long waits for birds.
- Water: Hydration to keep you comfortable during extended photography sessions.
- Field Notebook: A small notebook to track bird species and behaviors during your shoot.
- Rain Cover for Camera: Protection for your camera if the weather turns rainy.
- First-Aid Kit: Basic medical supplies in case of minor injuries while in the field.
Final Words
Using a bird blind is a perfect way to get a bird’s close view and take a perfect shot. It keeps you hidden from birds, which increases the bird’s chance of approaching close to you. For this, having a bird blind is important. So, I hope today’s guide will help you to make a bind easily.